Android Development Tips - Part II

During December I’ve decided to create a… let‘s call it an advent of code — where I would tweet (@cafonsomota) daily tips related with Android. I’ve decided to group them into the following categories:
- Android
- Android Development
- Android Studio
- Kotlin
- Java
- Product Design
This second part is dedicated to Kotlin (and a really little bit of Java) — you can find the first part of the Android development tips here Android development tips - Part I.
Kotlin
- When measuring the time a block of code takes to execute who thought there should be a better way than having to call
currentTimeMillis()before and after those instructions and then subtract both timestamps in order to know the time it took to execute? 🙋♂️ It should be something like:val startTime = System.currentTimeMillis() //block of code to measure //several instructions goes here val totalTime = System.currentTimeMillis() - startTimeYes, on Kotlin we’ve got:
measureTimeMillis{}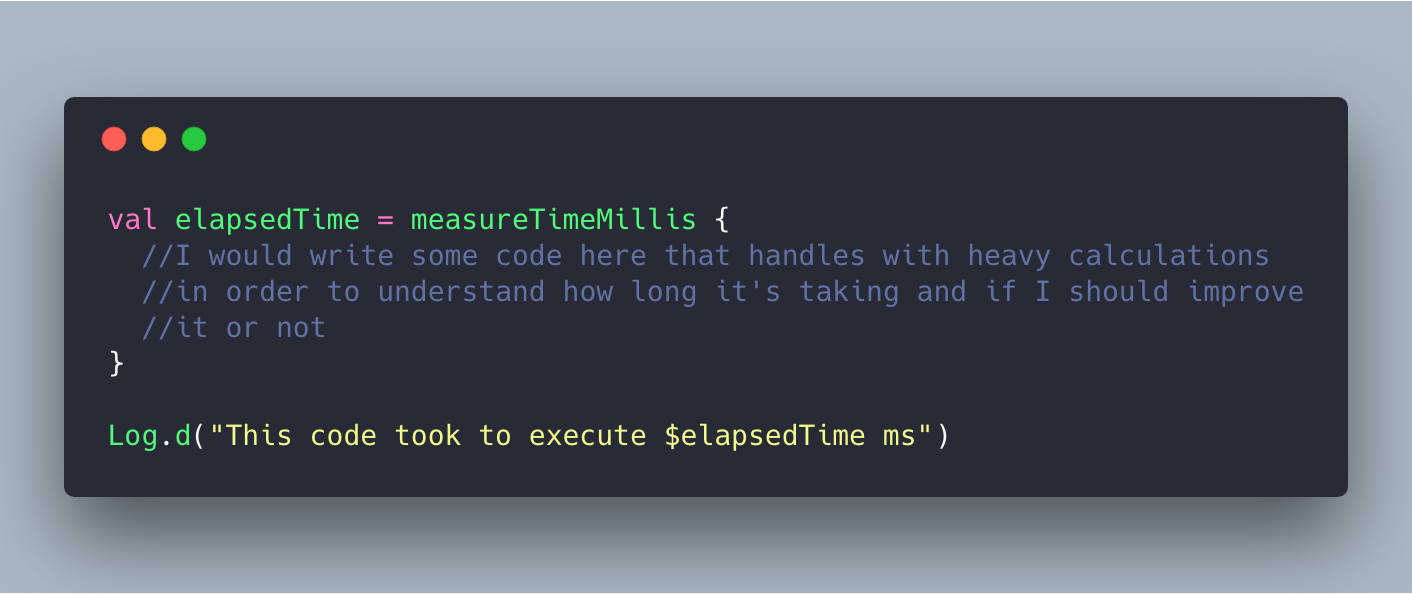
Measuring the time a block of code takes to execute - There’s a really useful function called —
require(Boolean)specially if you want to check if a parameter has an expected value or not. It will throwIllegalArgumentExceptionif the condition isfalse; but you can override that by callingreturn.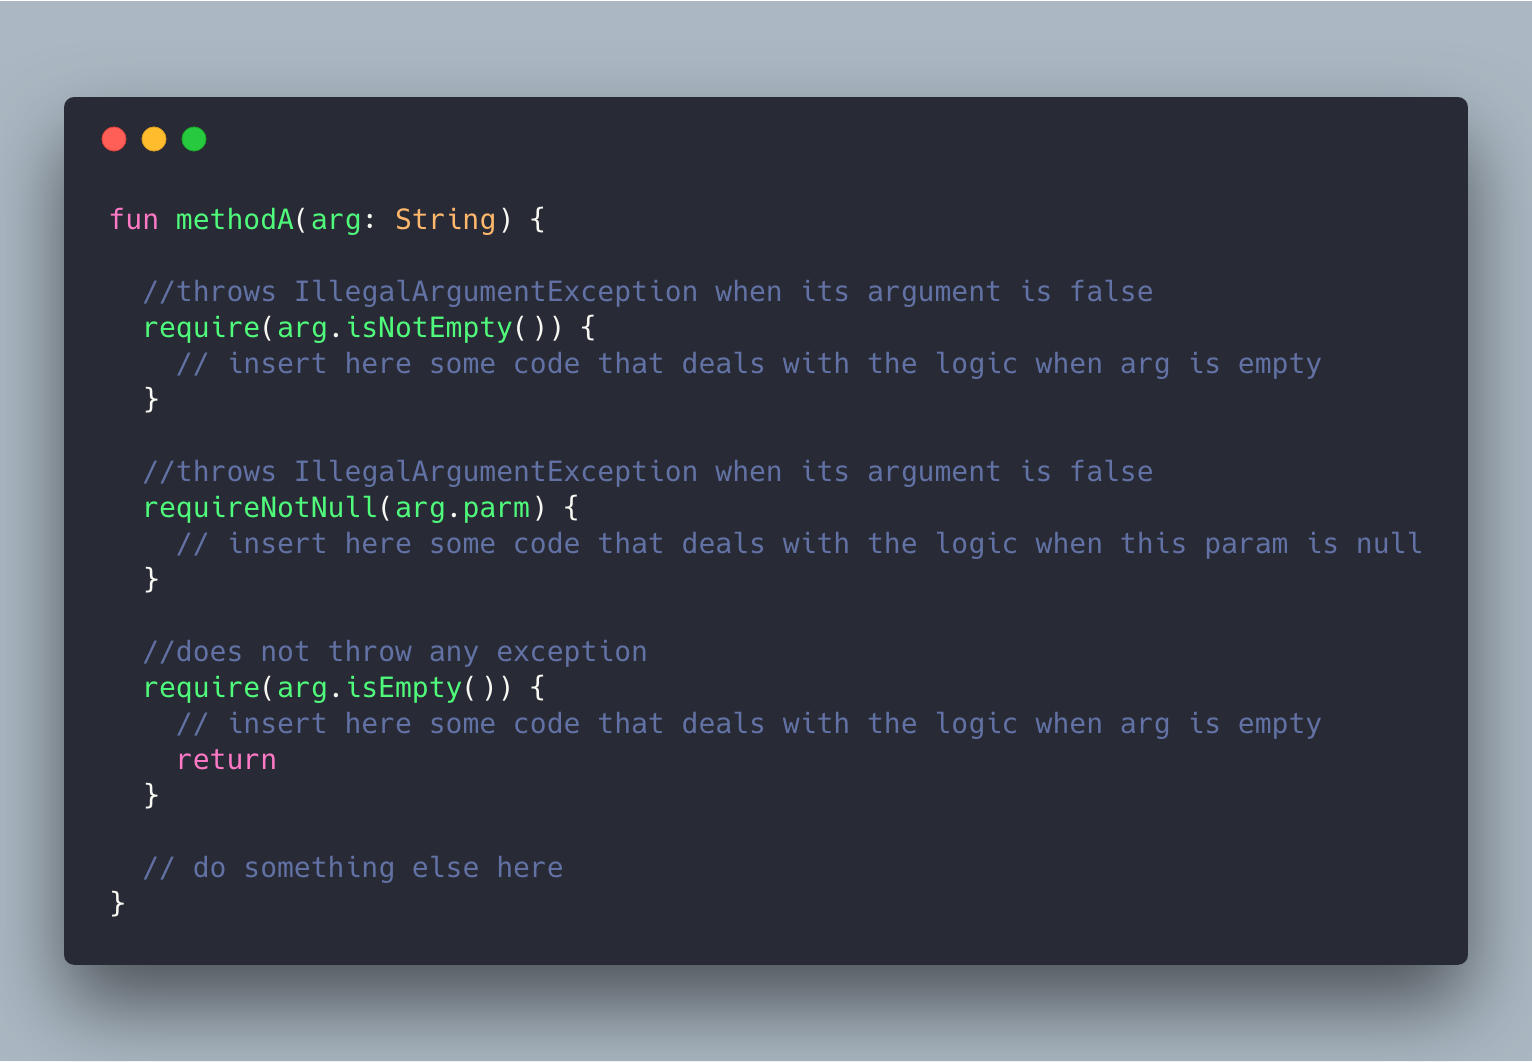
Example of using require(boolean)/requireNotNull(boolean) functions - We also have
check(Boolean)which is really similar torequire. The main difference between both is that whilerequireis used for parameters,checkis used for local variables. In other words, it’s used to “check” if an object contains a specific valuse/ state or other mandatory conditions.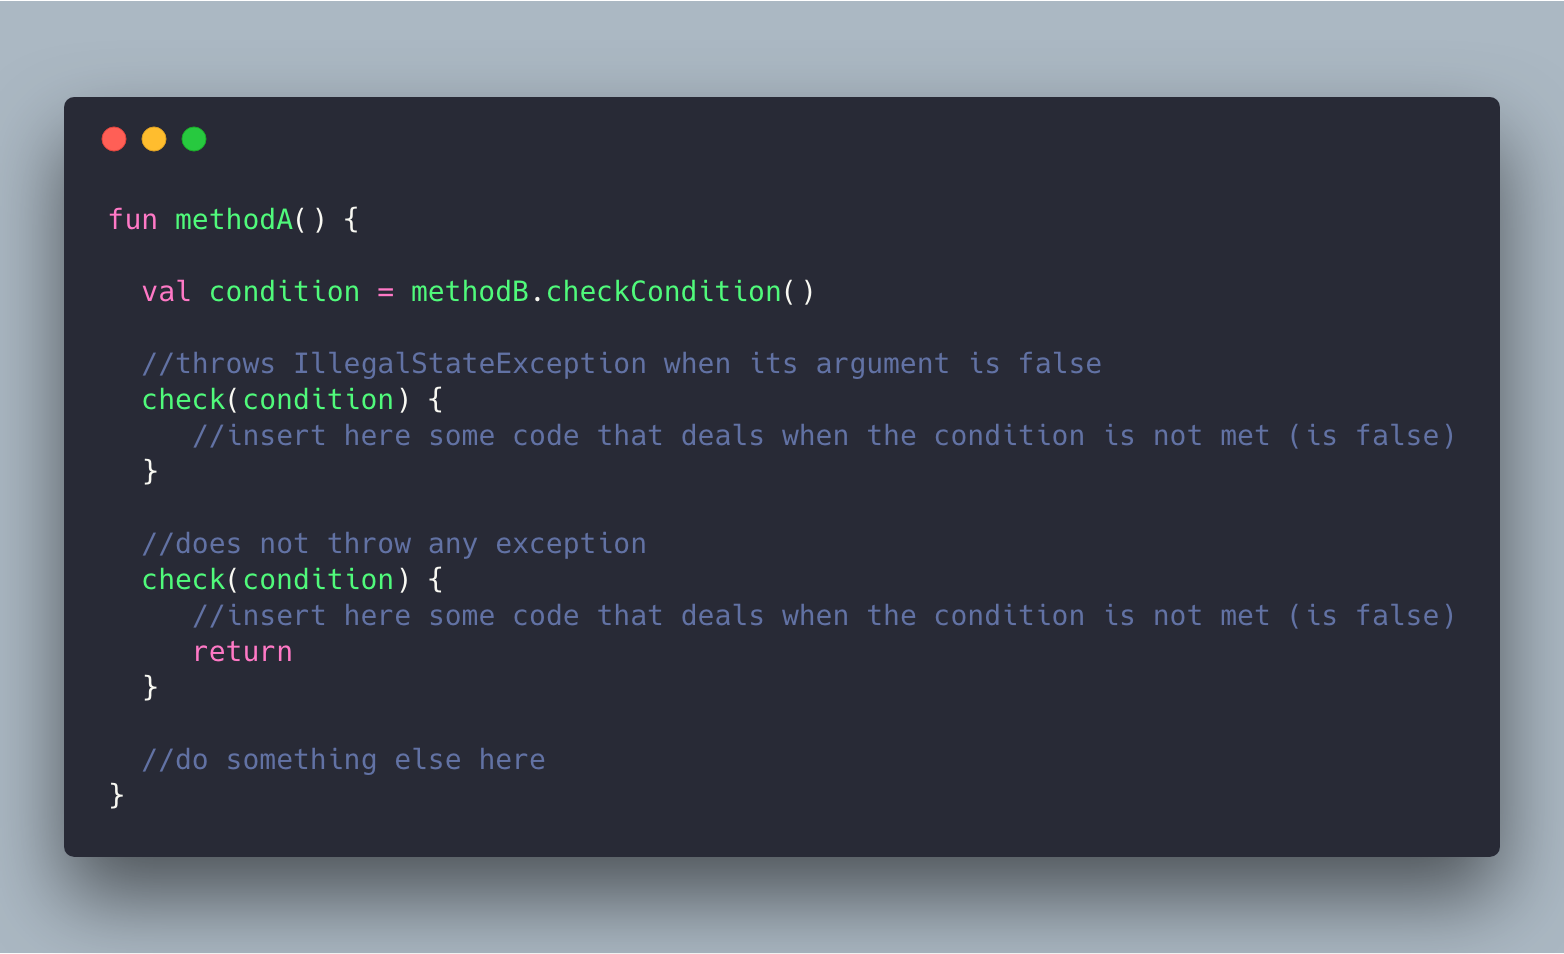
Example of using check(Boolean) function - Back in the dark ages when Kotlin was still being forged — there’s been a particularly consuming task during Android Development: creating POJOs.s In order to create a specifisc object you would needed to:
- Declare all the fields/constructor
- Write all the getters/setters
- Override equals()/ hashCode()/ toString()
Although, we could generate point 2 and 3 with Android Studio, if you’re using Hungarian notation on your code, you might end up having to go through all the getters/setters methods in order to remove that extra “m” added automatically.
This is something quite common to almost all the Android applications. I would say that you’ll end up creating at least one of those classes to hold specific data.
On Kotlin we’ve got something far more useful and fast to declare:
Data classes.
The compiler automatically derives everything declared on its constructor.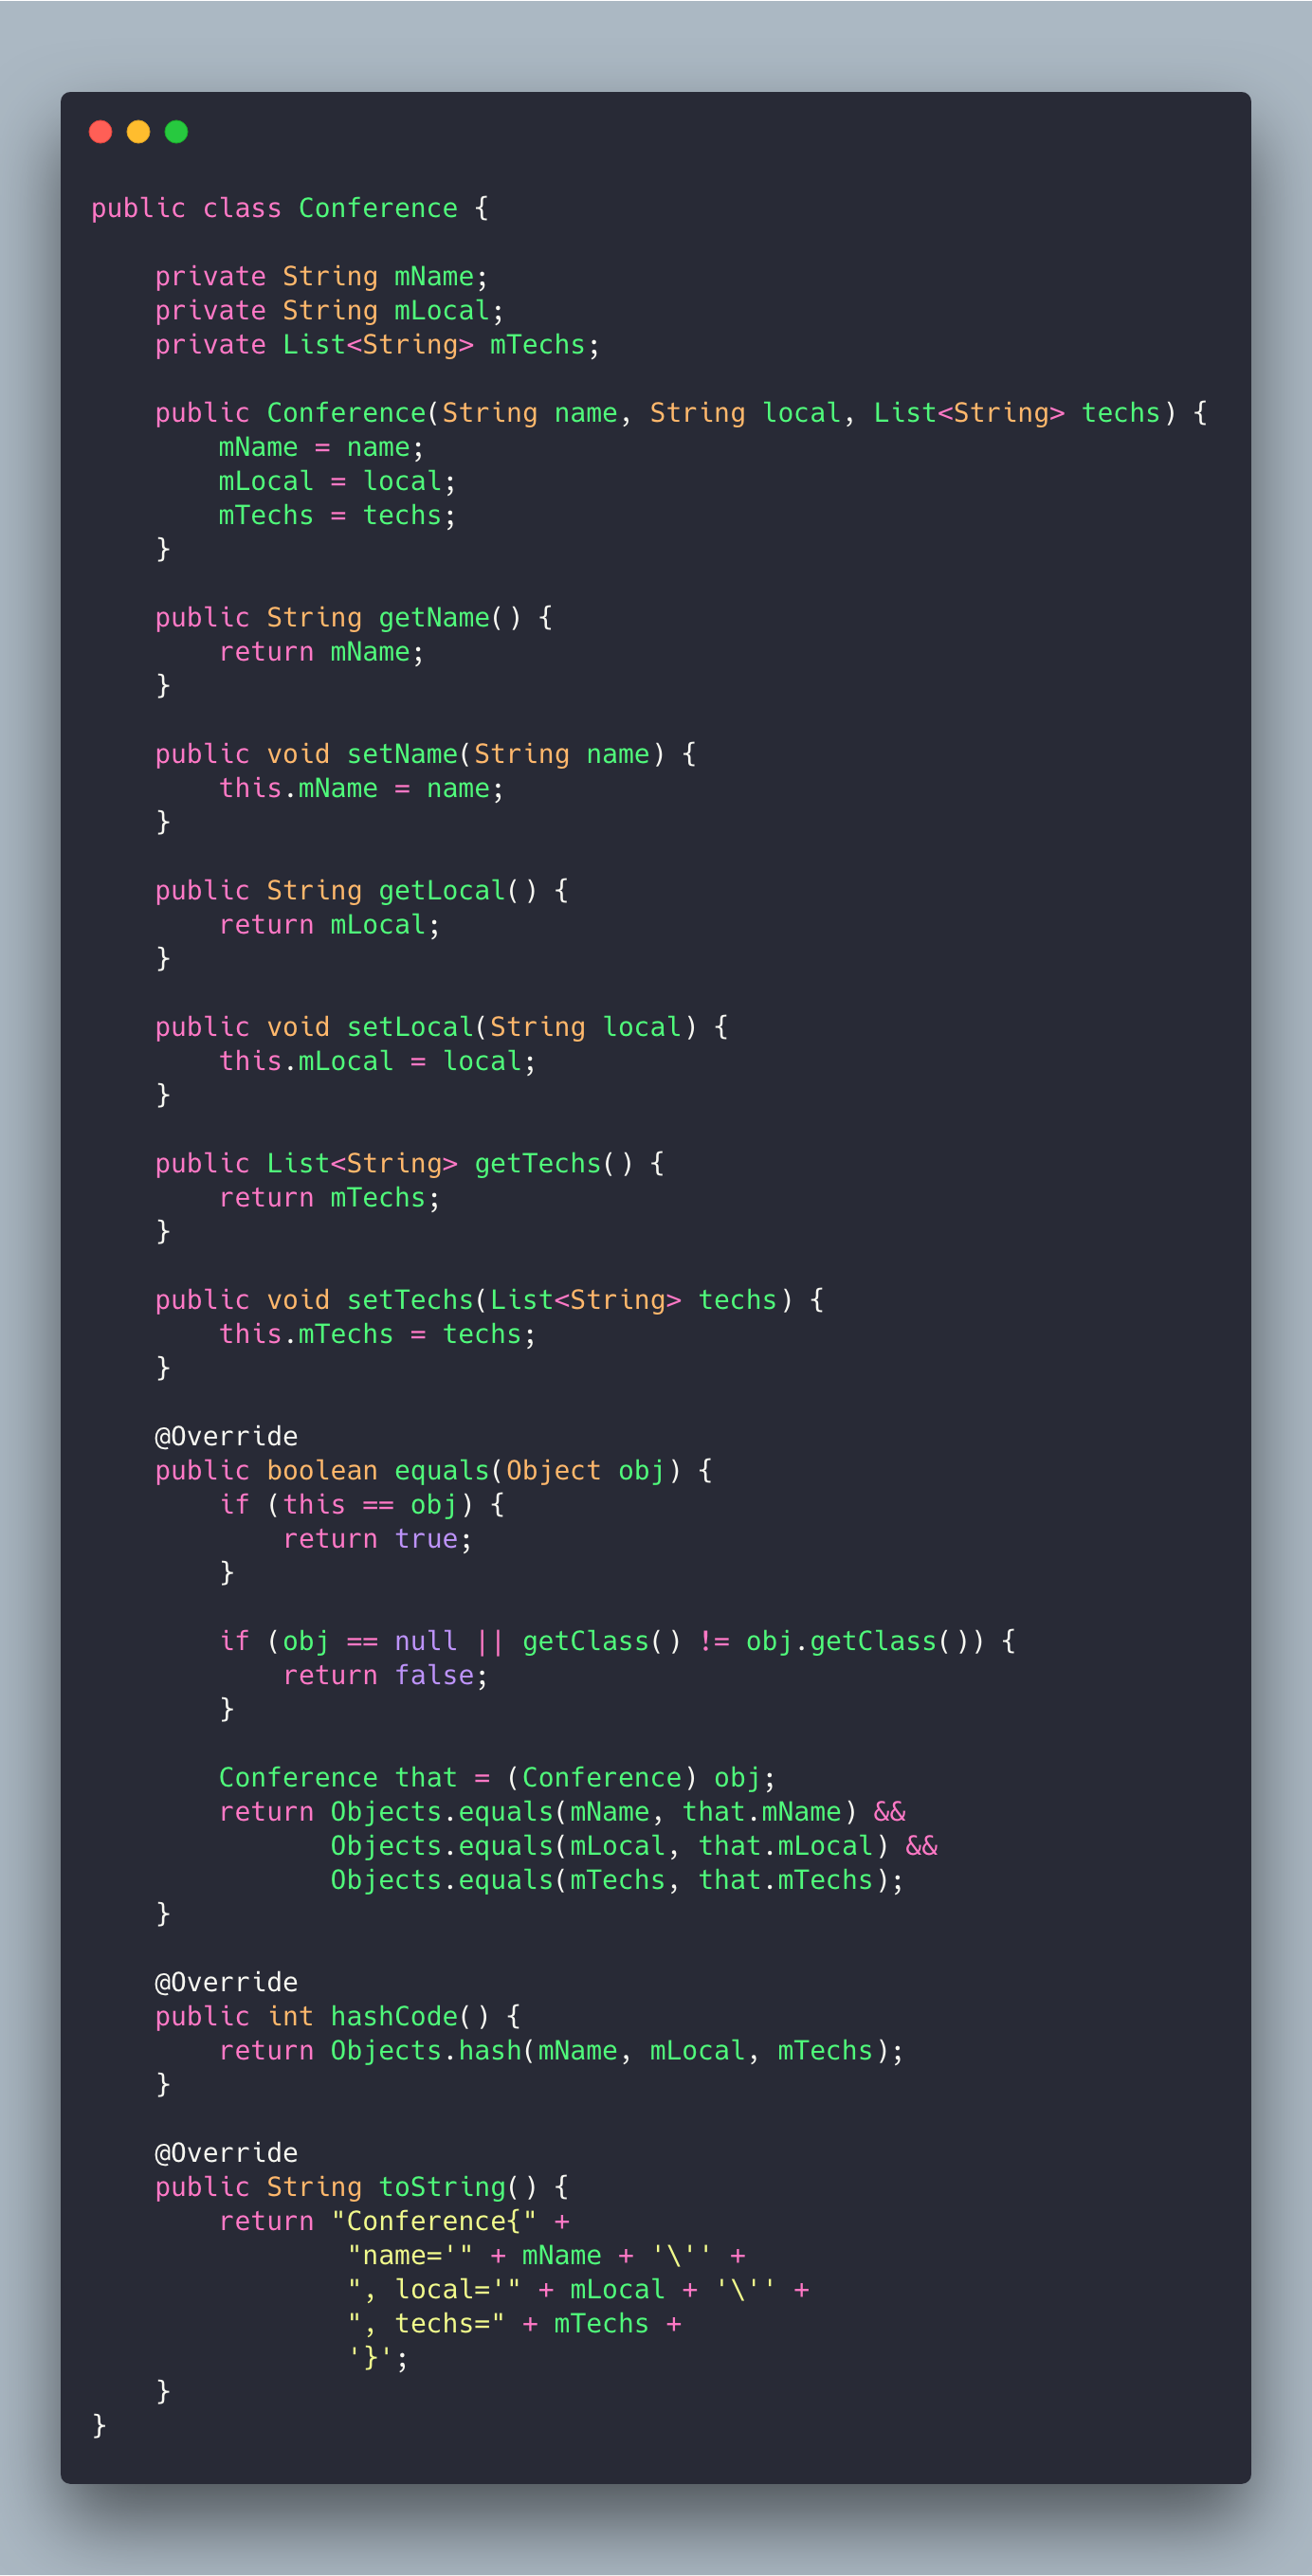

The same object declared in Java on the left and Kotlin in the right I know it’s really difficult to see, but there’s 65 lines in Java (on the left) vs 1 in Kotlin.
- Tired of implementing all the
Parcelablemethods by hand? I hope your class doesn’t have that many objects otherwise you’ll spend quite some time writing and reading everything fromParcel! Or, in alternative you can enable the experimental flag on androidExtesions (build.gradle) — and just useParcelizeinstead magic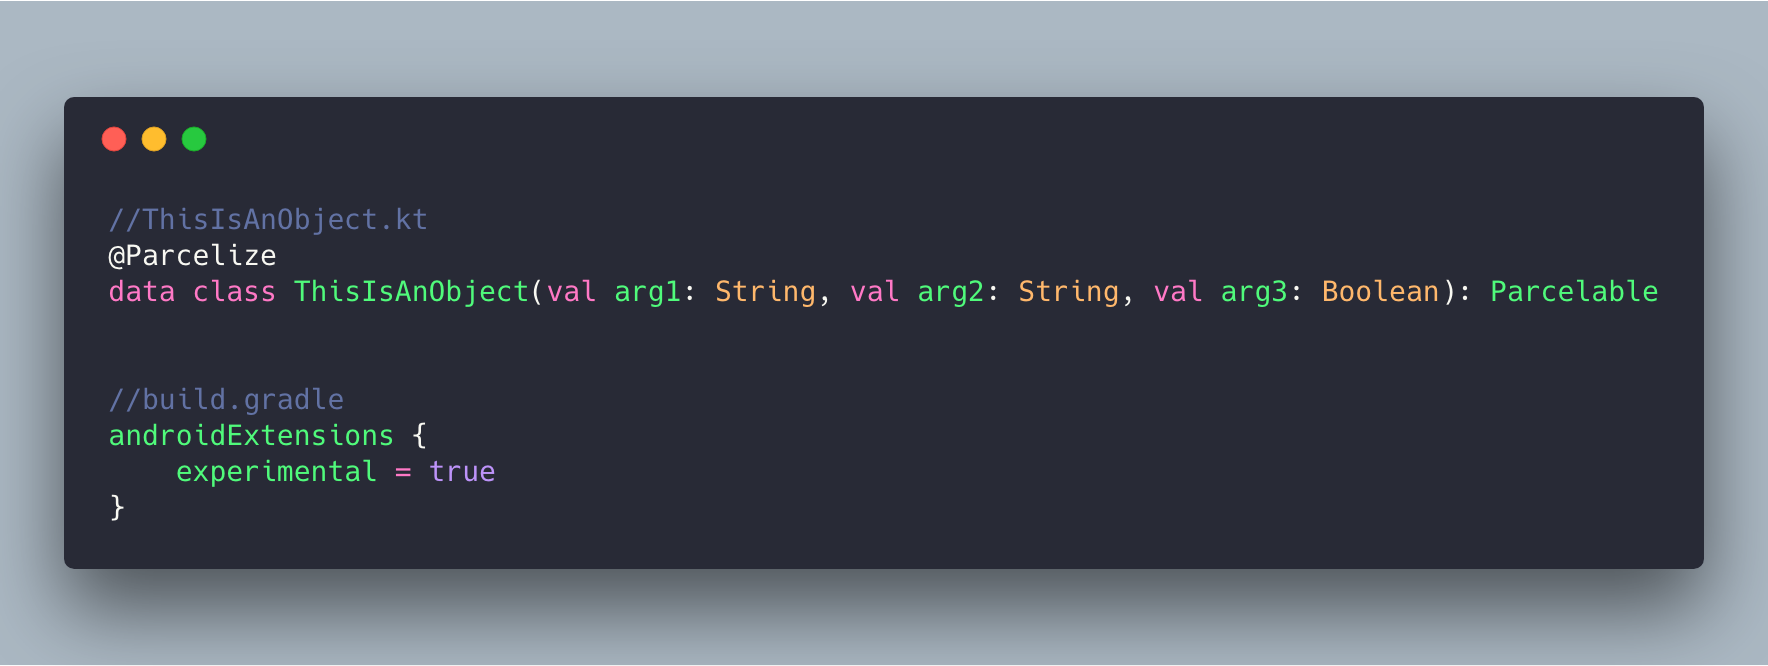
How to use Parcelize Note:
Parcelizeis still on experimental mode — meaning that it might not be 100% ready for production. Although I’ve never encountered any issue, use it at your own risk. - Kotlin also allow us to have: default arguments. This means that if you omit an argument when calling a method, if a default one is defined, it will be used instead. On JAVA the equivalent would be to:
— Creating multiple methods where one parameter varies or
— Always having to set all parameters
On Android we can easily see this when you try to extend a view. You’ll always have at least three different constructors that could be merged into a single one using Kotlin’s default values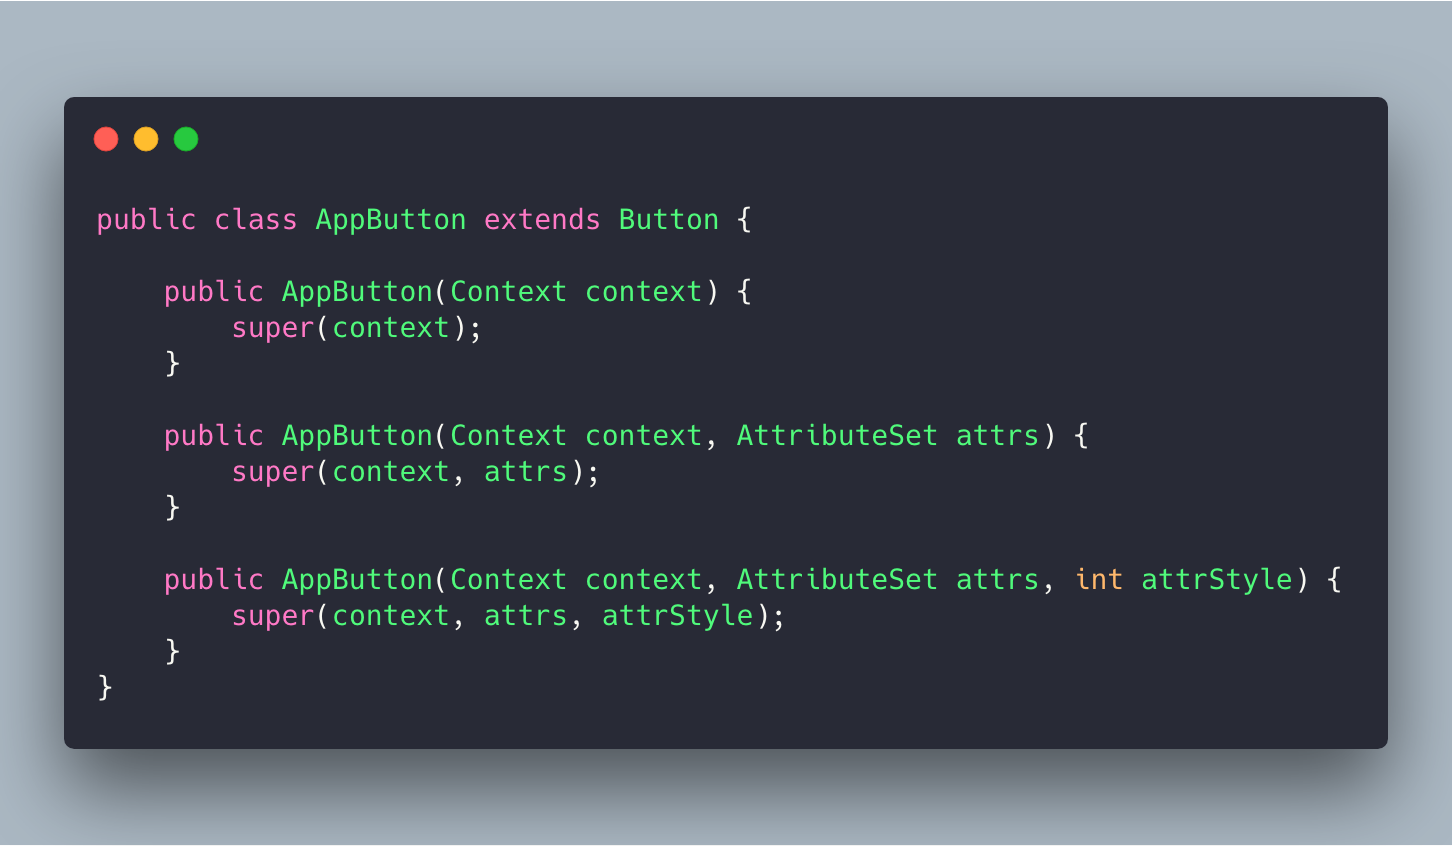

The same class written in Java on top and using Kotlin default arguments on bottom Note: you can see that in the Kotlin example I’ve added a specific annotation:
@JvmOverloads
This is used when you’ve got code written in Java that will call code written on Kotlin. When using default arguments, only the full method signature is visible to Java, you need to add @JvmOverloads annotation in order for the compiler to generate another set of methods (in this case constructor) that can be called from Java — it will create an additional method for each parameter that has a default value set.Along with this we also have named arguments. This is particularly important because, first it improves readability and secondly it allow us to select a specific argument when there’s more than one with a default value.

An example using named arguments - We also have
componentN()functions! In other words, they allow us to have destructuring declarations — meaning that it’s possible to decompose an object into a set of variables that can be used independently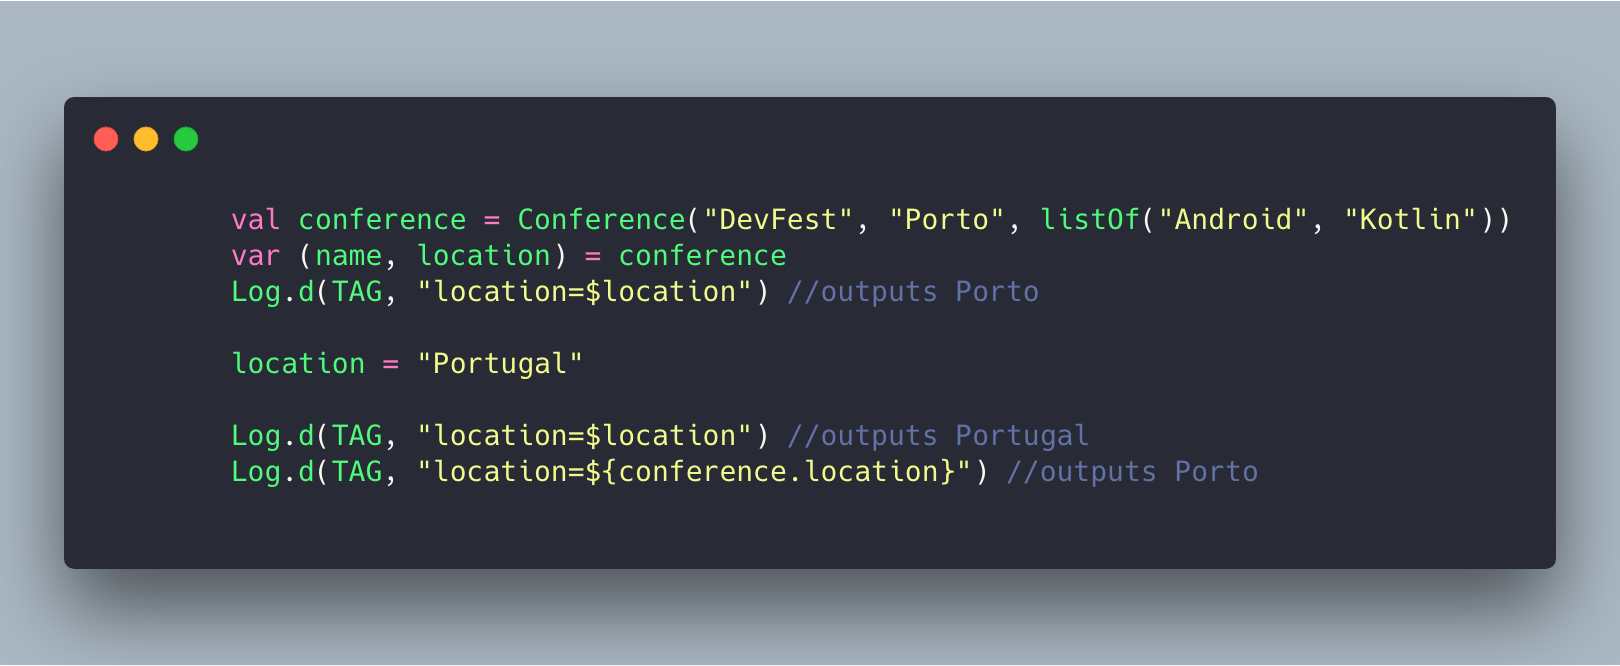
An example with destructuring declarations - If you’ve declared a variable as lateinit and want to check it on a specific method if it’s initialized you can do it via:
::KProperty.isInitialized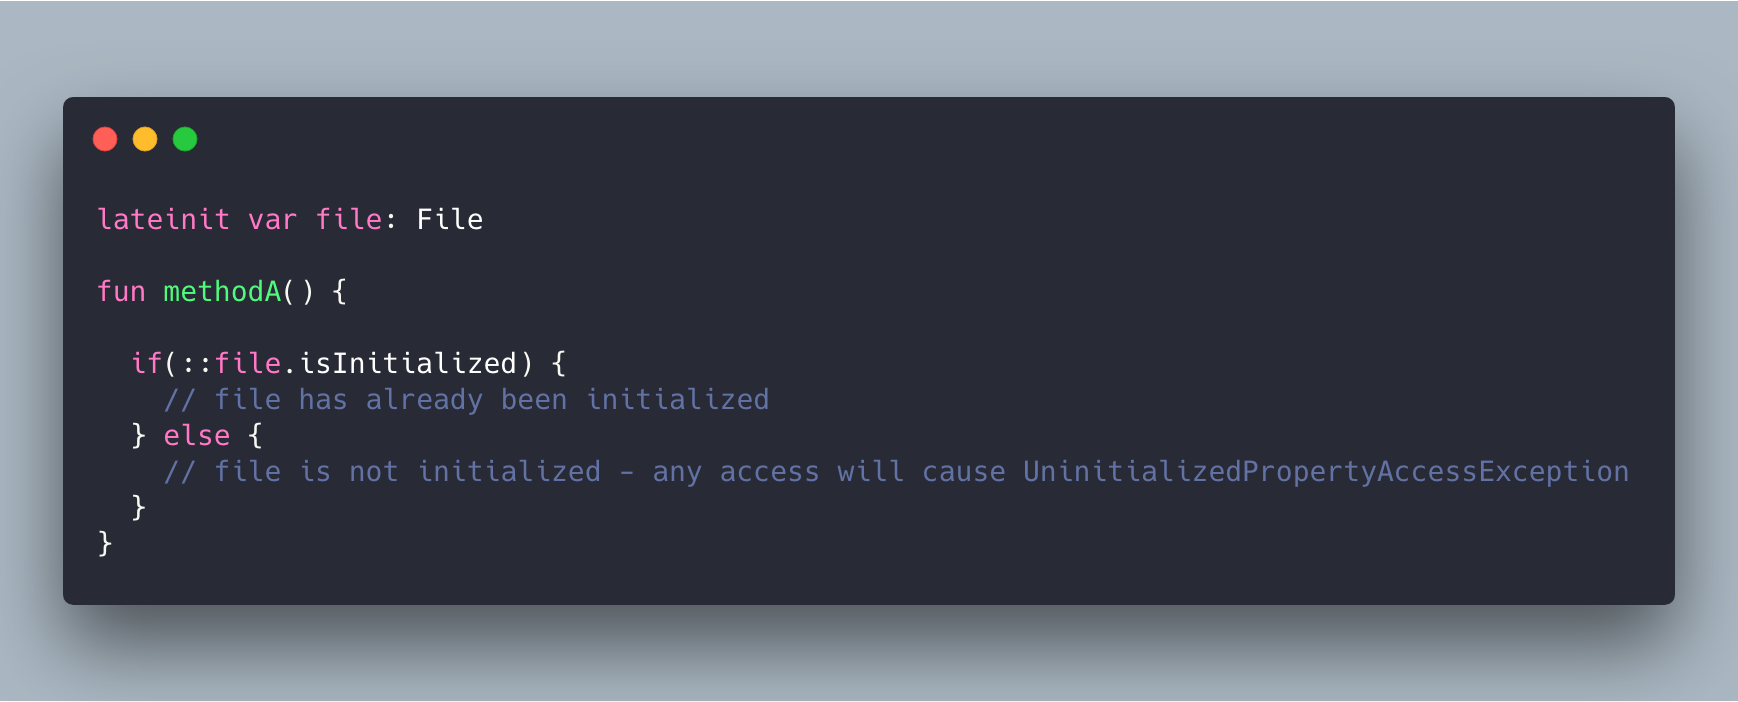
How to check if a property declared as lateinit is already initialized
Documentation
Kotlin has it own support for documenting code — it’s called KDoc and it’s the equivalent to Java’s Javadoc. If you’re already familiarised with Javadoc it’s really similar:
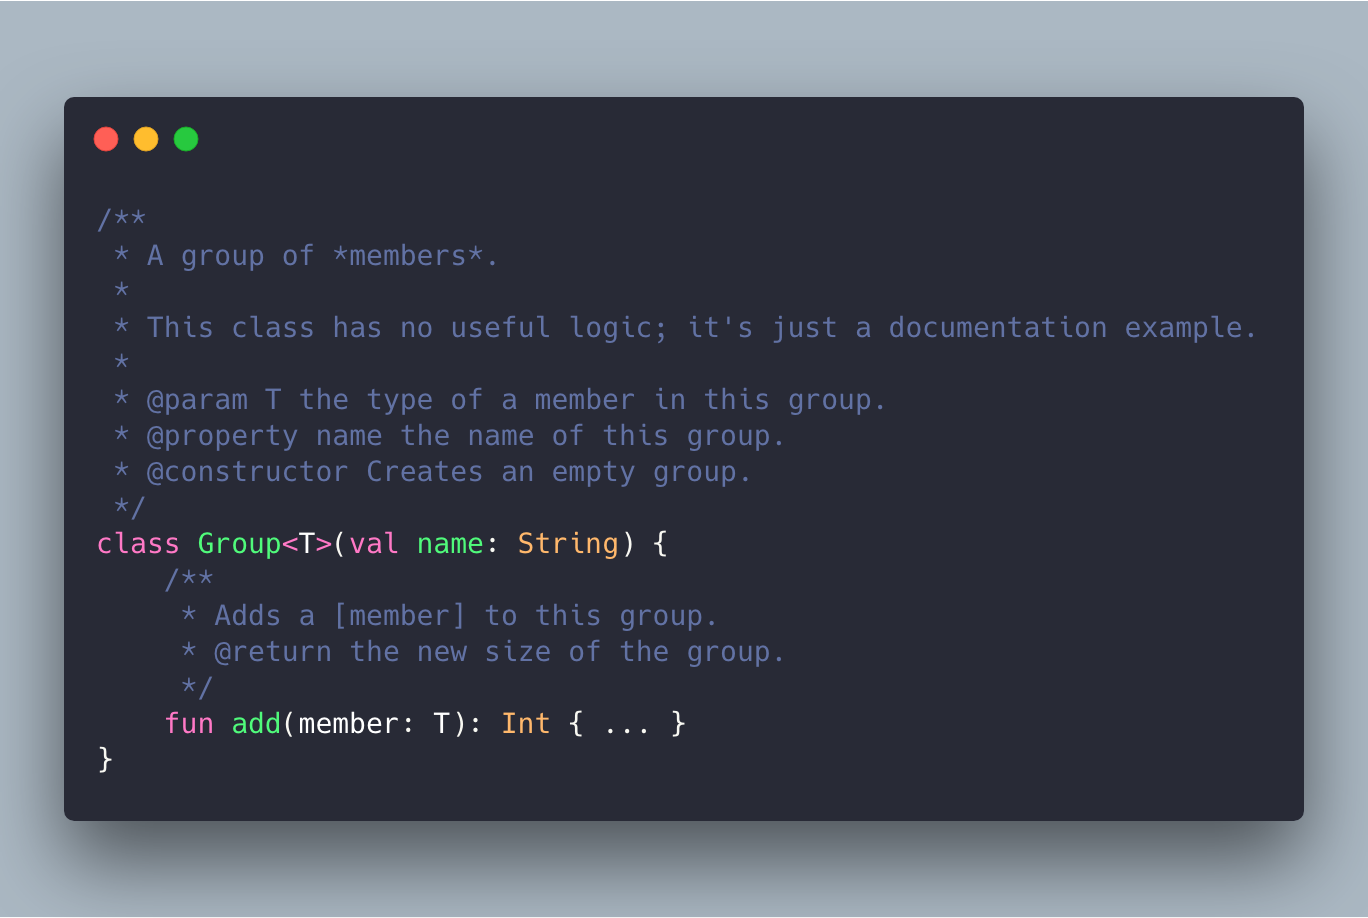
with the advantage that also supports Markdown for inline markup.
Let’s see an example:
On Javadoc if you want to enumerate some items you would use HTML tags in order to have indentation and bullet points. However, if you do this on KDoc, Android Studio wouldn’t render the documentation for that method/ class. For that you just need to use `* followed by the text to enumerate.
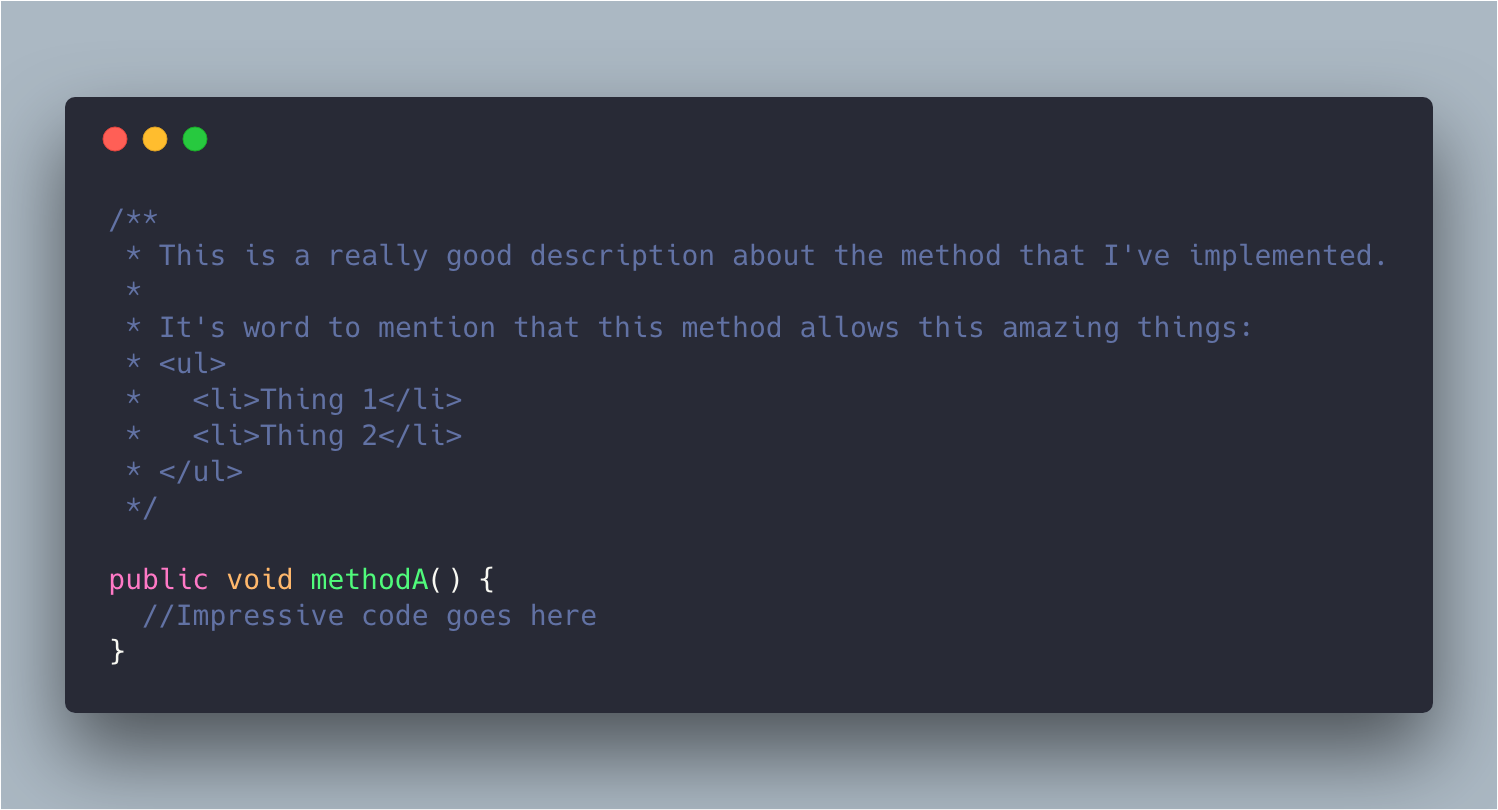
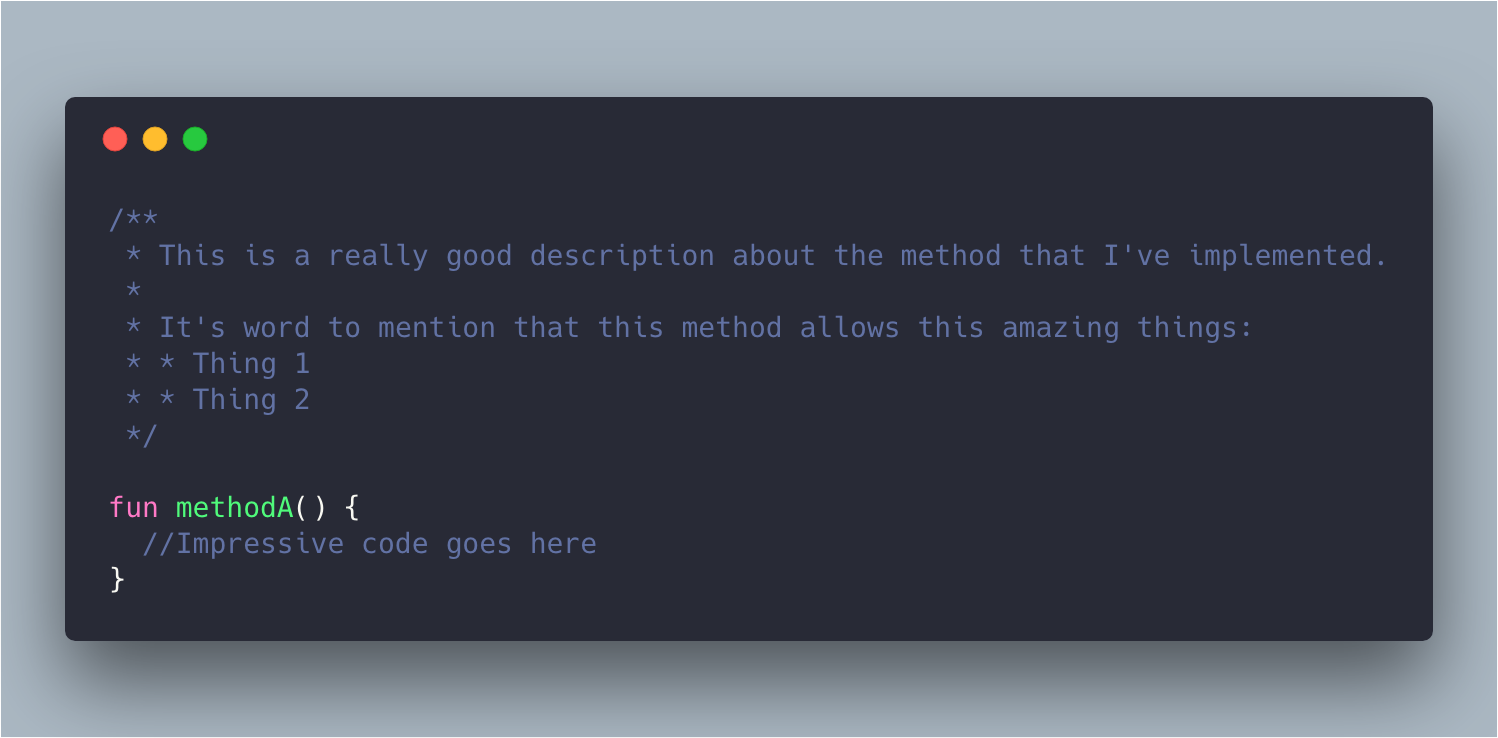
You can find all the information and examples about KDoc on the official kotlinlang website.
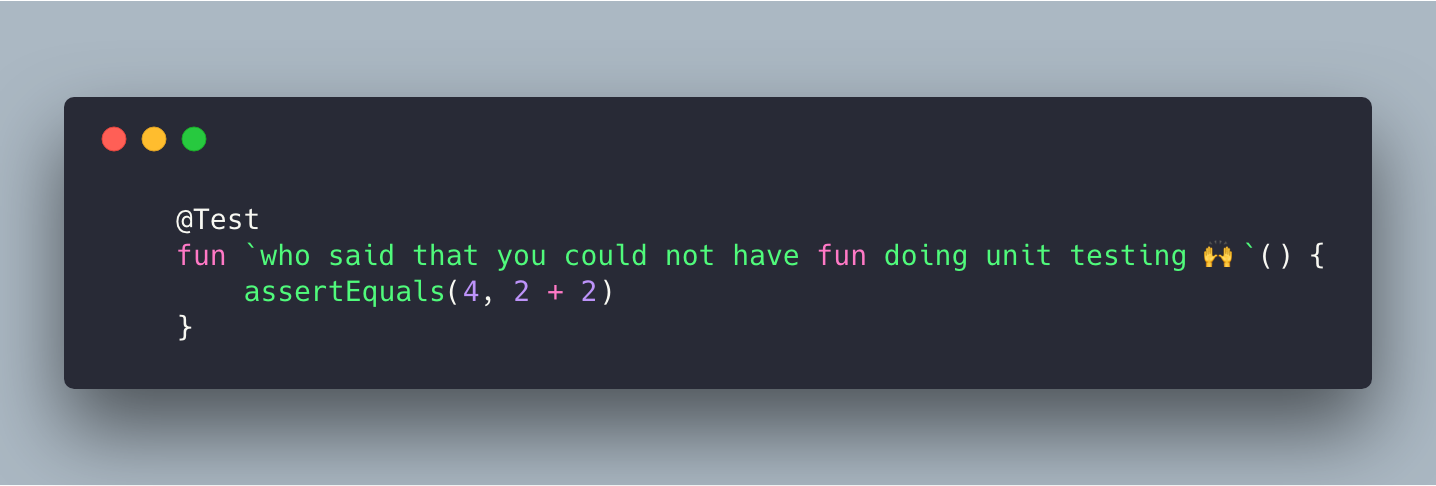
Unit testing
Apart from making your unit test display name completely readable you can also add emojis! 🙌🎉
Java
This is out of the box in Kotlin, but for those still using Java I was hoping to see it more often than I use to — annotations.
It’s really useful to have: IntRes, StringRes, or at least for Nullable and NonNull objects to easily understand the method return type and parameters.
Having them defined will add another layer of security in compile time, detecting if an object is sent as null when it’s not expected, or if you’re sending an int instead of a IntRes, etc.
